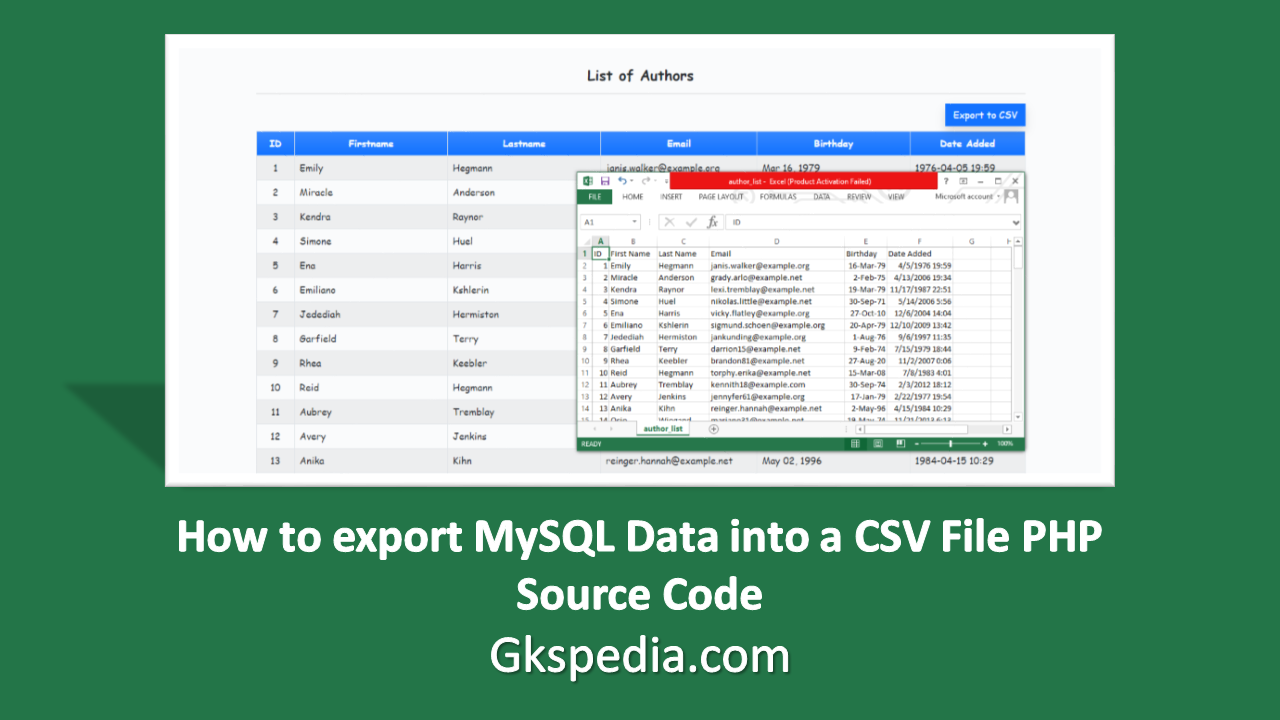
How to export MySQL Data into a CSV File PHP Source Code
Share Love
If you like this article How to export MySQL Data into a CSV File PHP Source Code please share with your friends and family to support our website. We wrote this article by researching on internet to find best content for you. You can find more articles like this on our website for free. We provided you some important tips regarding this topic by following them you can easily understand. If you need more information regarding How to export MySQL Data into a CSV File PHP Source Code you can ask in comments or you can contact us via contact us form available on this website. Thanks for reading and sharing.